Adobe Connect Meetings for Government
Government clients are now providing a number of courses using Adobe Connect.
We acknowledge that the overall experience for each user will vary based on several factors (e.g., the type of device you are using and the speed of your network connection). In order to optimize the effectiveness of this delivery method, please follow the guidance in this article.
Network Connections
Adobe Connect is available to you outside of the government network. Although you can participate in many courses from your government-issued computer, logging in from a personal computer or tablet, if possible, will enable you to avoid connection problems related to high volumes of government network traffic, especially during peak times.
A high-speed internet connection is recommended. In addition, you may get better results if you can connect your computer directly to your router using an Ethernet cable, rather than connecting wirelessly using your home’s Wi-Fi network.
If your home internet speed is less than desired, and you have a government-issued iPhone, try using it as a hotspot. This workaround is not recommended for daily work tasks – only to attend training.
Joining Adobe Connect Meetings
Google Chrome, Firefox, and Safari are the recommended web browsers when using Adobe Connect. If you are having difficulty connecting to the LTAP Course using one of the recommended browsers, please close that browser and try to connect again using a different browser.
The virtual classroom will be open one hour prior to class start time. We encourage you to log in early to confirm that your connection is working correctly. Class begins promptly at the start time listed in your email.
To join, click the link provided in your email
If you get disconnected from the class session or accidentally close your browser, please log back in to rejoin the class using the same link.
Select “Guest”.
Type your FIRST and LAST NAME. This information will be used to confirm your attendance in the class. Course completion will be based on Adobe Connect attendance reports.
Select “Enter Room”.
Select “Open in Application”. When you login to Adobe Connect for the first time, you may be asked to install the Adobe Connect client app. This is an approved app on the Information Technology Solutions Document, so you can install it on your government-issued computer without requesting further administrative permission to do so.
Select “Open Adobe Connect”.
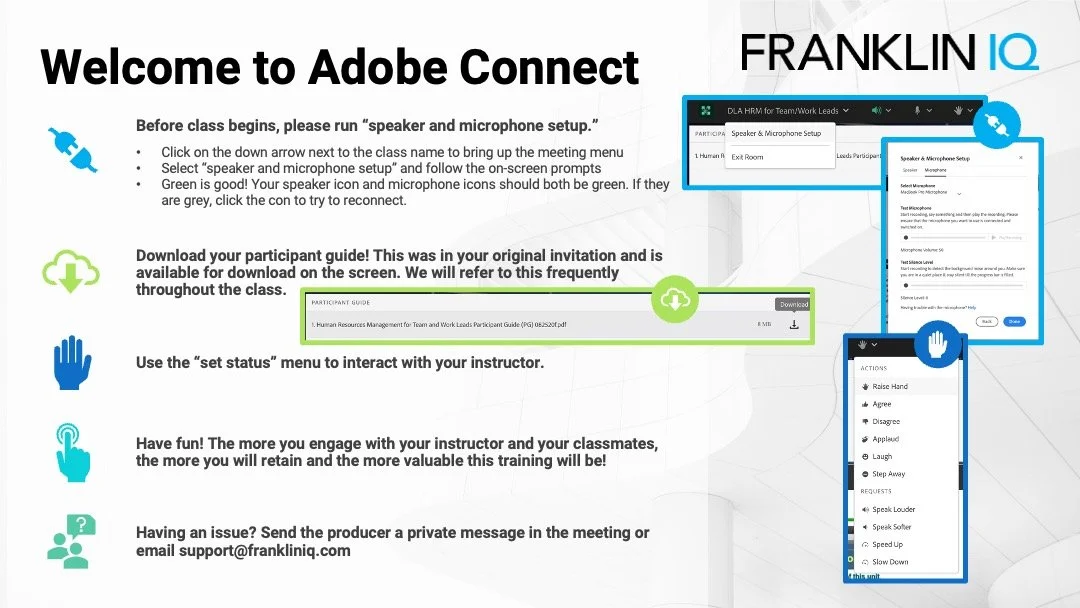
Please download the participant guide prior to the beginning of class.
If prompted, be sure to allow Adobe Connect to access your microphone.
Managing Your Audio Preferences
Please use a headset or earbuds with a microphone during class. This will reduce feedback, echo, and background noise, all of which can be distracting to other users, even if you do not hear it.
Each day before class begins, run the Audio Setup Wizard. This is found under the Meeting menu in the top left corner of the Adobe Connect app. This allows you to test the volume of your speakers and your microphone. It also helps normalize your level of silence, so do not skip that step.
After you have completed the audio setup wizard, set your audio preferences. Under the Meeting menu again, choose Preferences. Go to the Microphone section and set each item as follows:
Use Enhanced Audio – Turn this on initially. (If you experience audio distortion, come back and uncheck it.)
Acoustic Echo Cancellation Mode – Set to Headphones.
Automatic Gain Control – Turn this on.
Audio Quality – Set to Fast.
Connect your microphone and mute it. To the right of the Meeting menu, you will see a microphone icon. Click the down arrow next to it to expand the menu. Select Connect My Microphone. When your microphone is connected, the icon will be green. When you are muted, the green microphone will have a line through it. If your microphone is not connected, this icon will be gray.

